
Gallery Walls Without the Guesswork

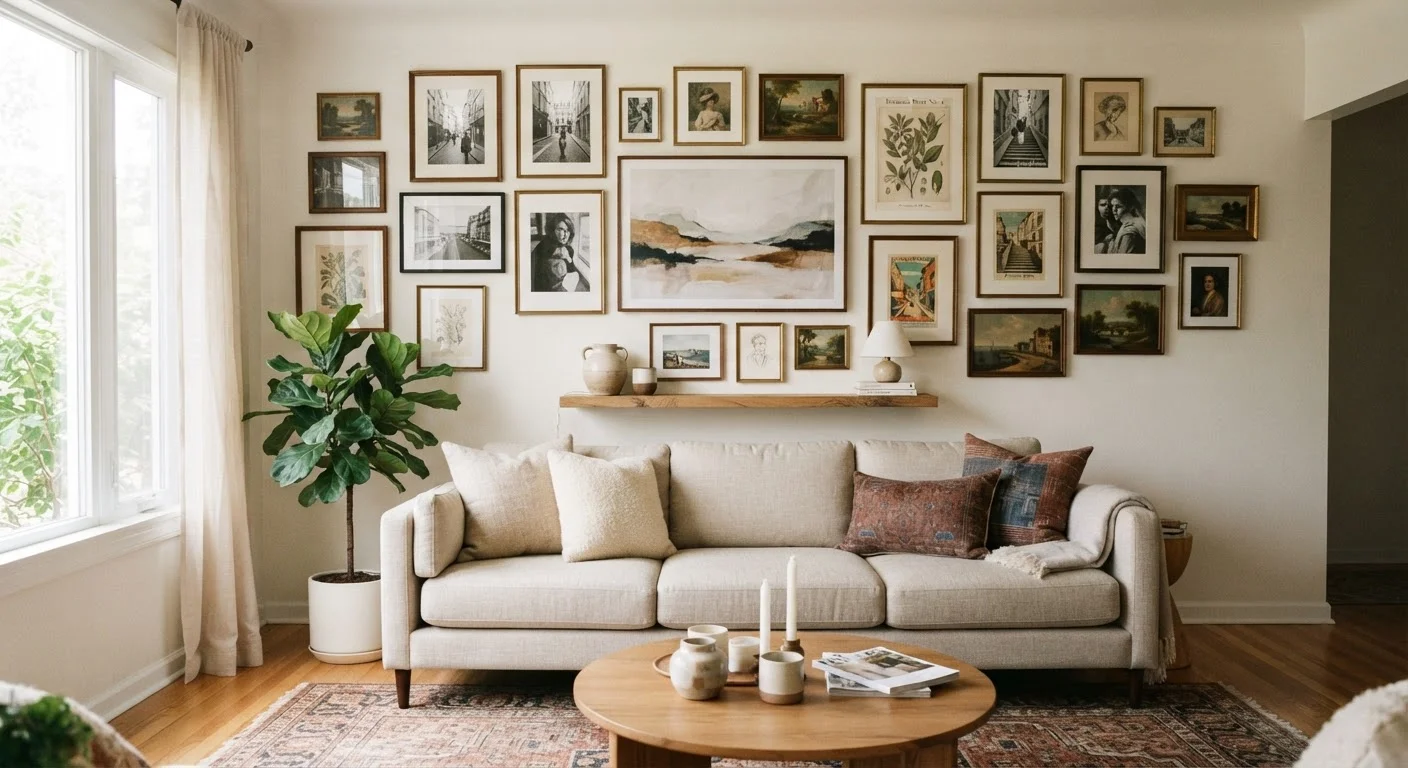
Photo: ArticleHood.com | Precision In Every Word editorial
Key Takeaways
- Plan your layout on the floor or with paper templates before making any holes in the wall.
- Consistent spacing between frames - typically 2 to 3 inches - creates visual order.
- Mixing frame sizes and shapes adds interest while a shared color or finish ties everything together.
- A visual anchor, such as the largest piece, should be placed first and guide the rest of the layout.
- Gallery walls work in almost any room when scaled to fit the available wall space.
Why Gallery Walls Go Wrong - and How to Avoid It
Gallery walls earn a reputation for being tricky because most people approach them impulsively: frames go up one at a time, spacing gets eyeballed, and the result looks more accidental than designed. The underlying structure is actually straightforward once you understand a few principles.
The most common pitfalls are inconsistent spacing, no visual anchor, and frames that share nothing in common. Spacing should be deliberate - too tight and the wall feels busy, too spread out and the arrangement loses its sense of cohesion. A visual anchor (your largest or most visually dominant piece) gives the eye somewhere to start and lets the surrounding frames feel like supporting elements rather than clutter.
Before you begin, it helps to do a quick assessment of the wall you're working with. If you haven't already evaluated how your room is functioning as a whole, our room-by-room décor audit can help you identify whether a gallery wall is the right addition before you invest time and materials.
Tape measure
Measure wall space and calculate even gaps between frames.
Level (bubble or digital)
Ensure each frame hangs straight and rows align horizontally.
Pencil
Mark nail positions and layout guides on the wall without permanent marks.
Hammer and picture-hanging nails
Secure frames to the wall at marked positions.
Painter's tape
Hold paper templates in place during layout planning without damaging walls.
Stud finder
Locate wall studs for safely hanging heavier frames.
Kraft paper or newspaper
Create template cutouts of each frame for dry-run layout planning.
What You'll Need Before You Start
Having the right tools on hand before you begin will prevent the frustrating mid-project scrambles that often cause mistakes. Review the list below and gather everything in one place.
What you will need
Use Paper Templates to Preview Your Layout
Step-by-Step: Hanging Your Gallery Wall
Follow these steps in order. Resist the urge to skip the planning stages - they're what separate a gallery wall that looks considered from one that looks cluttered. For related display principles, our article on open shelving pitfalls covers why composition and restraint matter just as much on shelves as on walls.
Check Your Walls Before You Hang
Gather and Curate Your Pieces
Lay all your frames and artwork on the floor where you can see them together. Look for a common thread - a shared color palette, frame finish (all black, all wood, all metal), or consistent subject matter. You don't need everything to match exactly, but at least one unifying element prevents the arrangement from looking random.
Aim for a mix of sizes. A collection of identically sized frames tends to feel flat. Varying dimensions - large anchor pieces, medium supporting frames, and smaller accent pieces - creates the visual rhythm that makes gallery walls compelling.
Measure Your Wall Space
Use your tape measure to note the width and height of the wall area you're working with. Mark the boundaries lightly in pencil if that helps you visualize the space. Consider how the gallery wall will relate to nearby furniture - a arrangement hung above a sofa or console table generally looks most grounded when it doesn't extend wider than the furniture piece beneath it.
Plan Your Layout on the Floor
Before touching the wall, arrange your frames on the floor in the footprint of your intended display area. Start with your largest piece and build outward. Maintain consistent spacing between frames - 2 to 3 inches is a reliable target that reads as intentional rather than crowded or scattered.
Step back and look at the arrangement from a few feet away. Adjust until the composition feels balanced. Take a photo on your phone to reference once you move to the wall.
Create and Hang Paper Templates
Trace each frame onto kraft paper or newspaper and cut out the shapes. Label each template so you know which frame it corresponds to. Tape the templates to the wall using painter's tape, recreating your floor layout as closely as possible.
Use a level to verify rows are straight. Step back, assess, and make any adjustments. Once satisfied, mark the nail position on each template - most frames hang from a point slightly below the top edge.
Nail and Hang Each Frame
Drive nails through your paper templates at the marked positions. Tear the templates away carefully after nailing. Hang each frame, using a level to confirm it's straight before moving on. Work from the center outward, or from your anchor piece toward the edges, to maintain the planned spacing.
Step Back and Make Final Adjustments
Once everything is hung, stand back and look at the full arrangement from normal viewing distance. Minor tilts are common - adjust frames until they sit level. Check that spacing looks consistent across the whole display rather than just between neighboring frames.
If something feels off compositionally, don't hesitate to swap two pieces or shift a frame slightly. A gallery wall is rarely locked in on the first attempt, and small refinements make a meaningful difference.
Keeping Your Gallery Wall Fresh Over Time
One advantage of a well-planned gallery wall is that it's easy to update. Because you've established consistent spacing and a coherent visual language, swapping in a new print or photograph doesn't require starting over - just replace a piece of similar scale and style.
Avoid the temptation to keep adding frames beyond what the wall can hold. The home improvement principles that apply to renovation projects apply here too: restraint and intention produce better results than accumulation. A gallery wall with breathing room almost always looks more purposeful than one that fills every inch of available space.
Dust frames and glass periodically, and check that hanging hardware remains secure - wire can stretch slightly over time, causing frames to tilt or hang lower than intended.
The content on this site is for informational purposes only and is not a substitute for professional advice. Always consult a qualified professional for guidance specific to your situation.